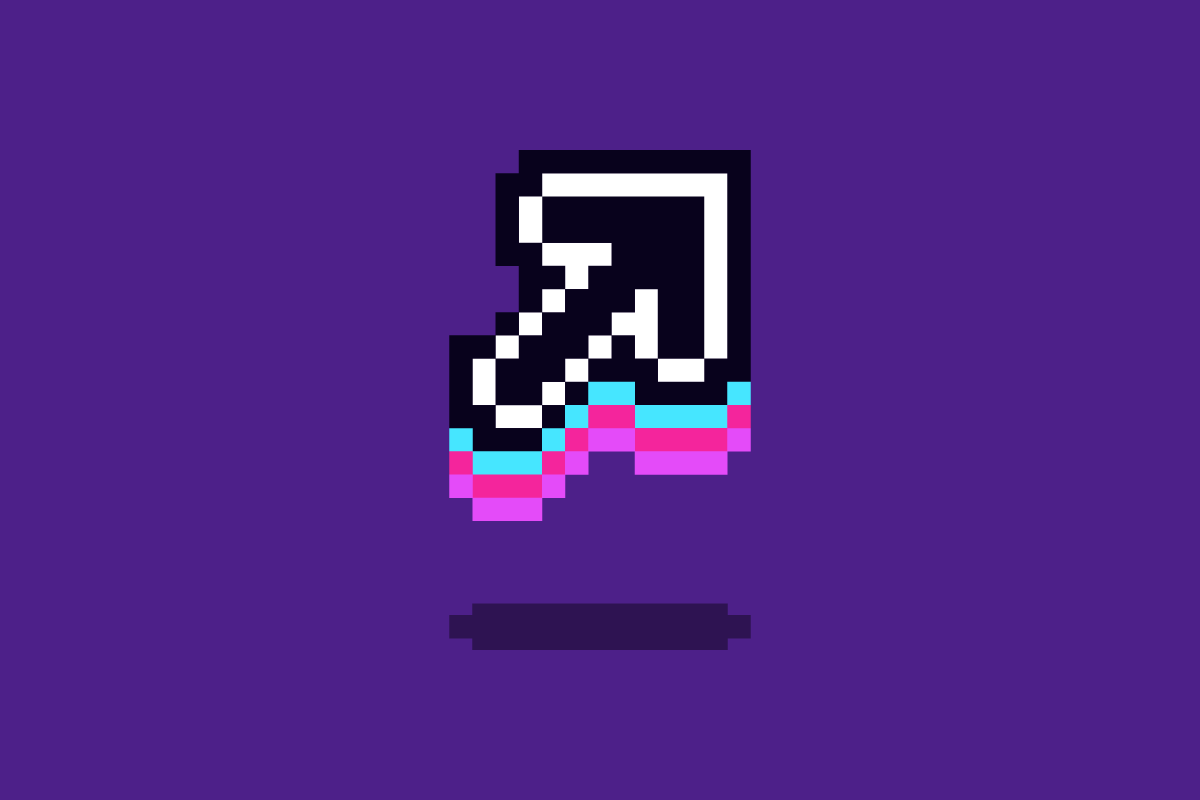
When the Oklahoma City Thunder approached us to create a retro video game, we were more than thrilled. It’s not every day you get to work with an NBA team. We decided to build a runner game, much like Super Mario Run. Players could pick one of 5 current players and run from the team’s broken down bus to the arena just in time for the game, dodging enemies that resemble other NBA foes’ mascots.
One of our team members, Ethan Muller, spearheaded game design and development, and he wrote an awesome custom soundtrack for the game too. I was tasked with creating artwork for the game. We wanted the graphics to have a 16-bit feel, so the question became which application to use. My mind immediately went to Photoshop. But given the popularity of retro games, it seemed like there should be something out there built specially for this purpose. It turned out there was. At Ethan’s suggestion, I looked into Aseprite, which was a joy to use. Aseprite is described as an “Animated sprite editor & pixel art tool,” which fit our output needs easily.
The first thing you notice about Aseprite, besides it’s affordable $19.99 price, is that the entire application UI is in a pixelated style. At first I thought this would get annoying and distracting, but I was pleasantly surprised when I started using it. I found it to be a fun touch, and it wasn’t intrusive at all.
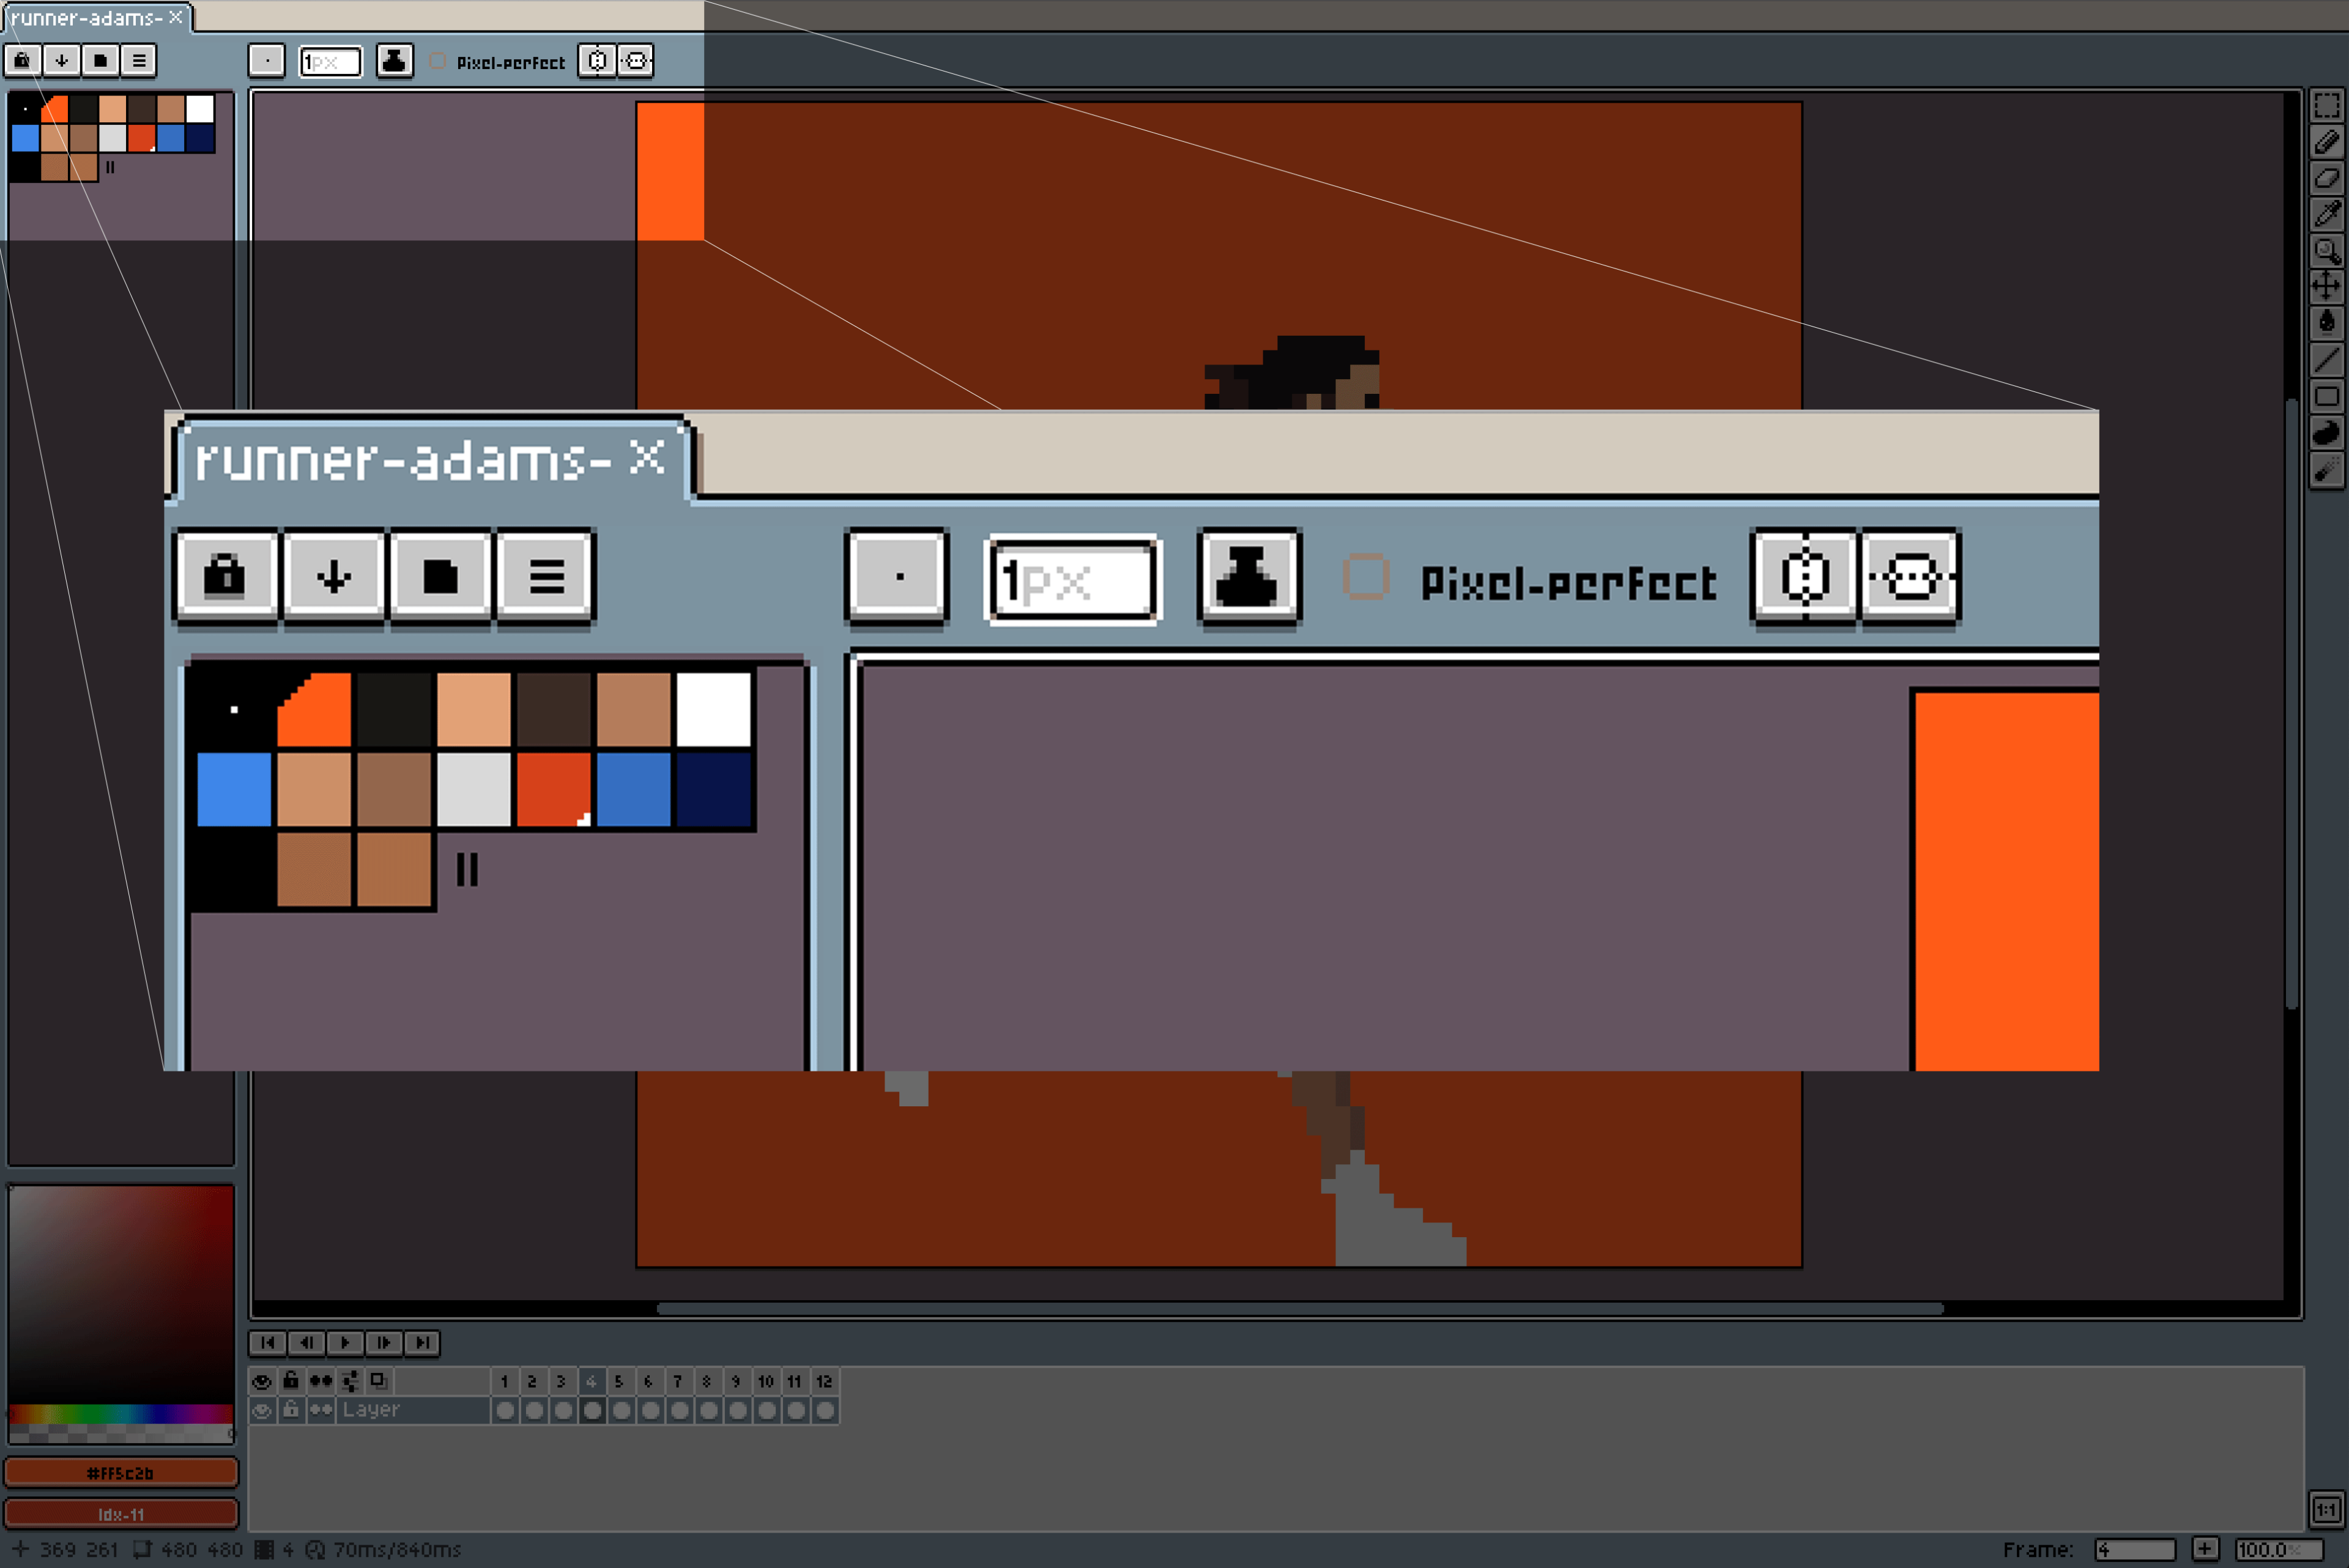
The interface was intuitive and easy to navigate using shortcuts. Many of the shortcuts and conventions of Photoshop are used in the app, some of which I found by accident.
Let’s look a little closer at the process of creating the player portraits and running animations.
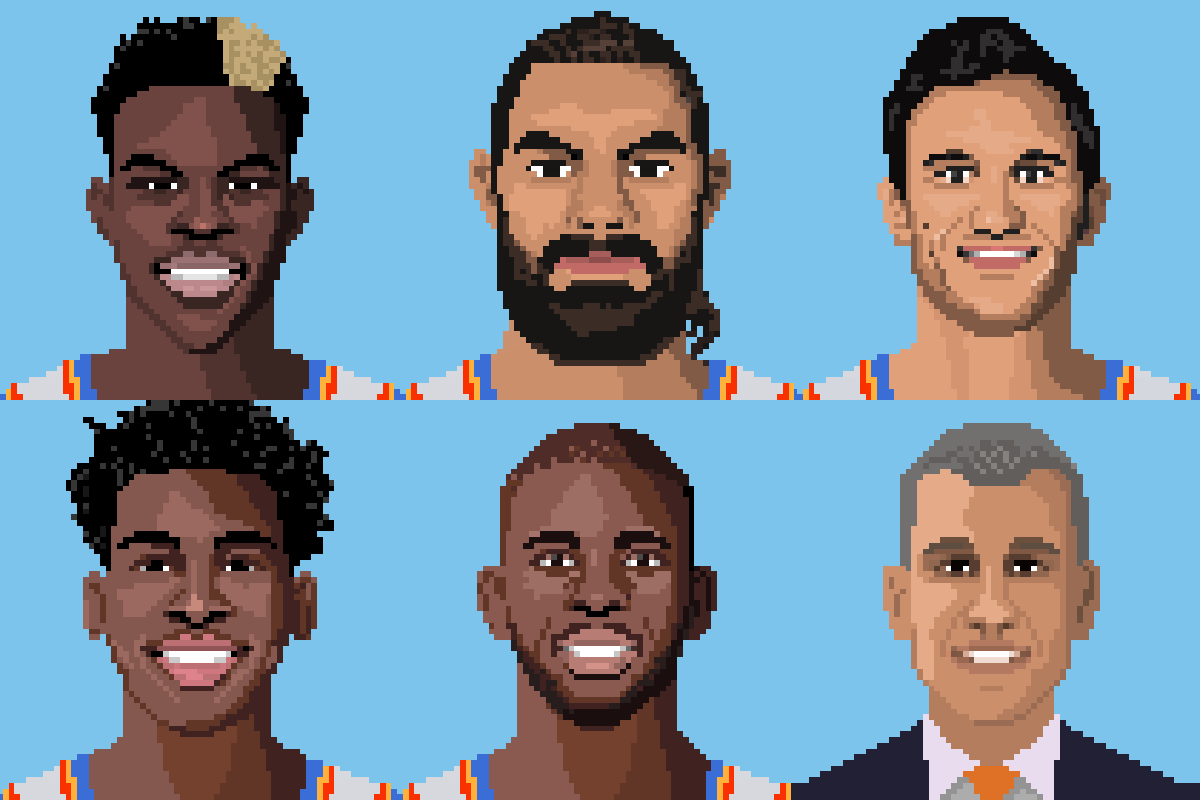
Player Portraits
I was excited to see each player’s features and personality translated to a retro style. I chose to start at 70px by 70px. One of Aseprite’s benefits is that it allows you to very easily export 2x, 3x, 4x, and up. Unsurprisingly, the first portrait was the hardest as I figured out a good process. By the end of the project, I could create a portrait in about 45 minutes.
I started by grabbing the player’s official portrait off NBA.com and creating a reference layer for that original image. I then created a few more layers: a background layer that just contained a solid color, a uniform layer that was the same on every portrait, a base layer that roughed out a player’s basic head shape, and a detail layer where I drew the player’s features, hair, and shading.
Asesprite has all the tools you’d expect: pencil, fill, selection, eraser, shape, line, etc. But I also discovered the vertical symmetry tool. When I positioned a vertical line in the center of a player’s face, this tool would draw in the exact same position on the other side of the player’s face, which sped up my drawing time.
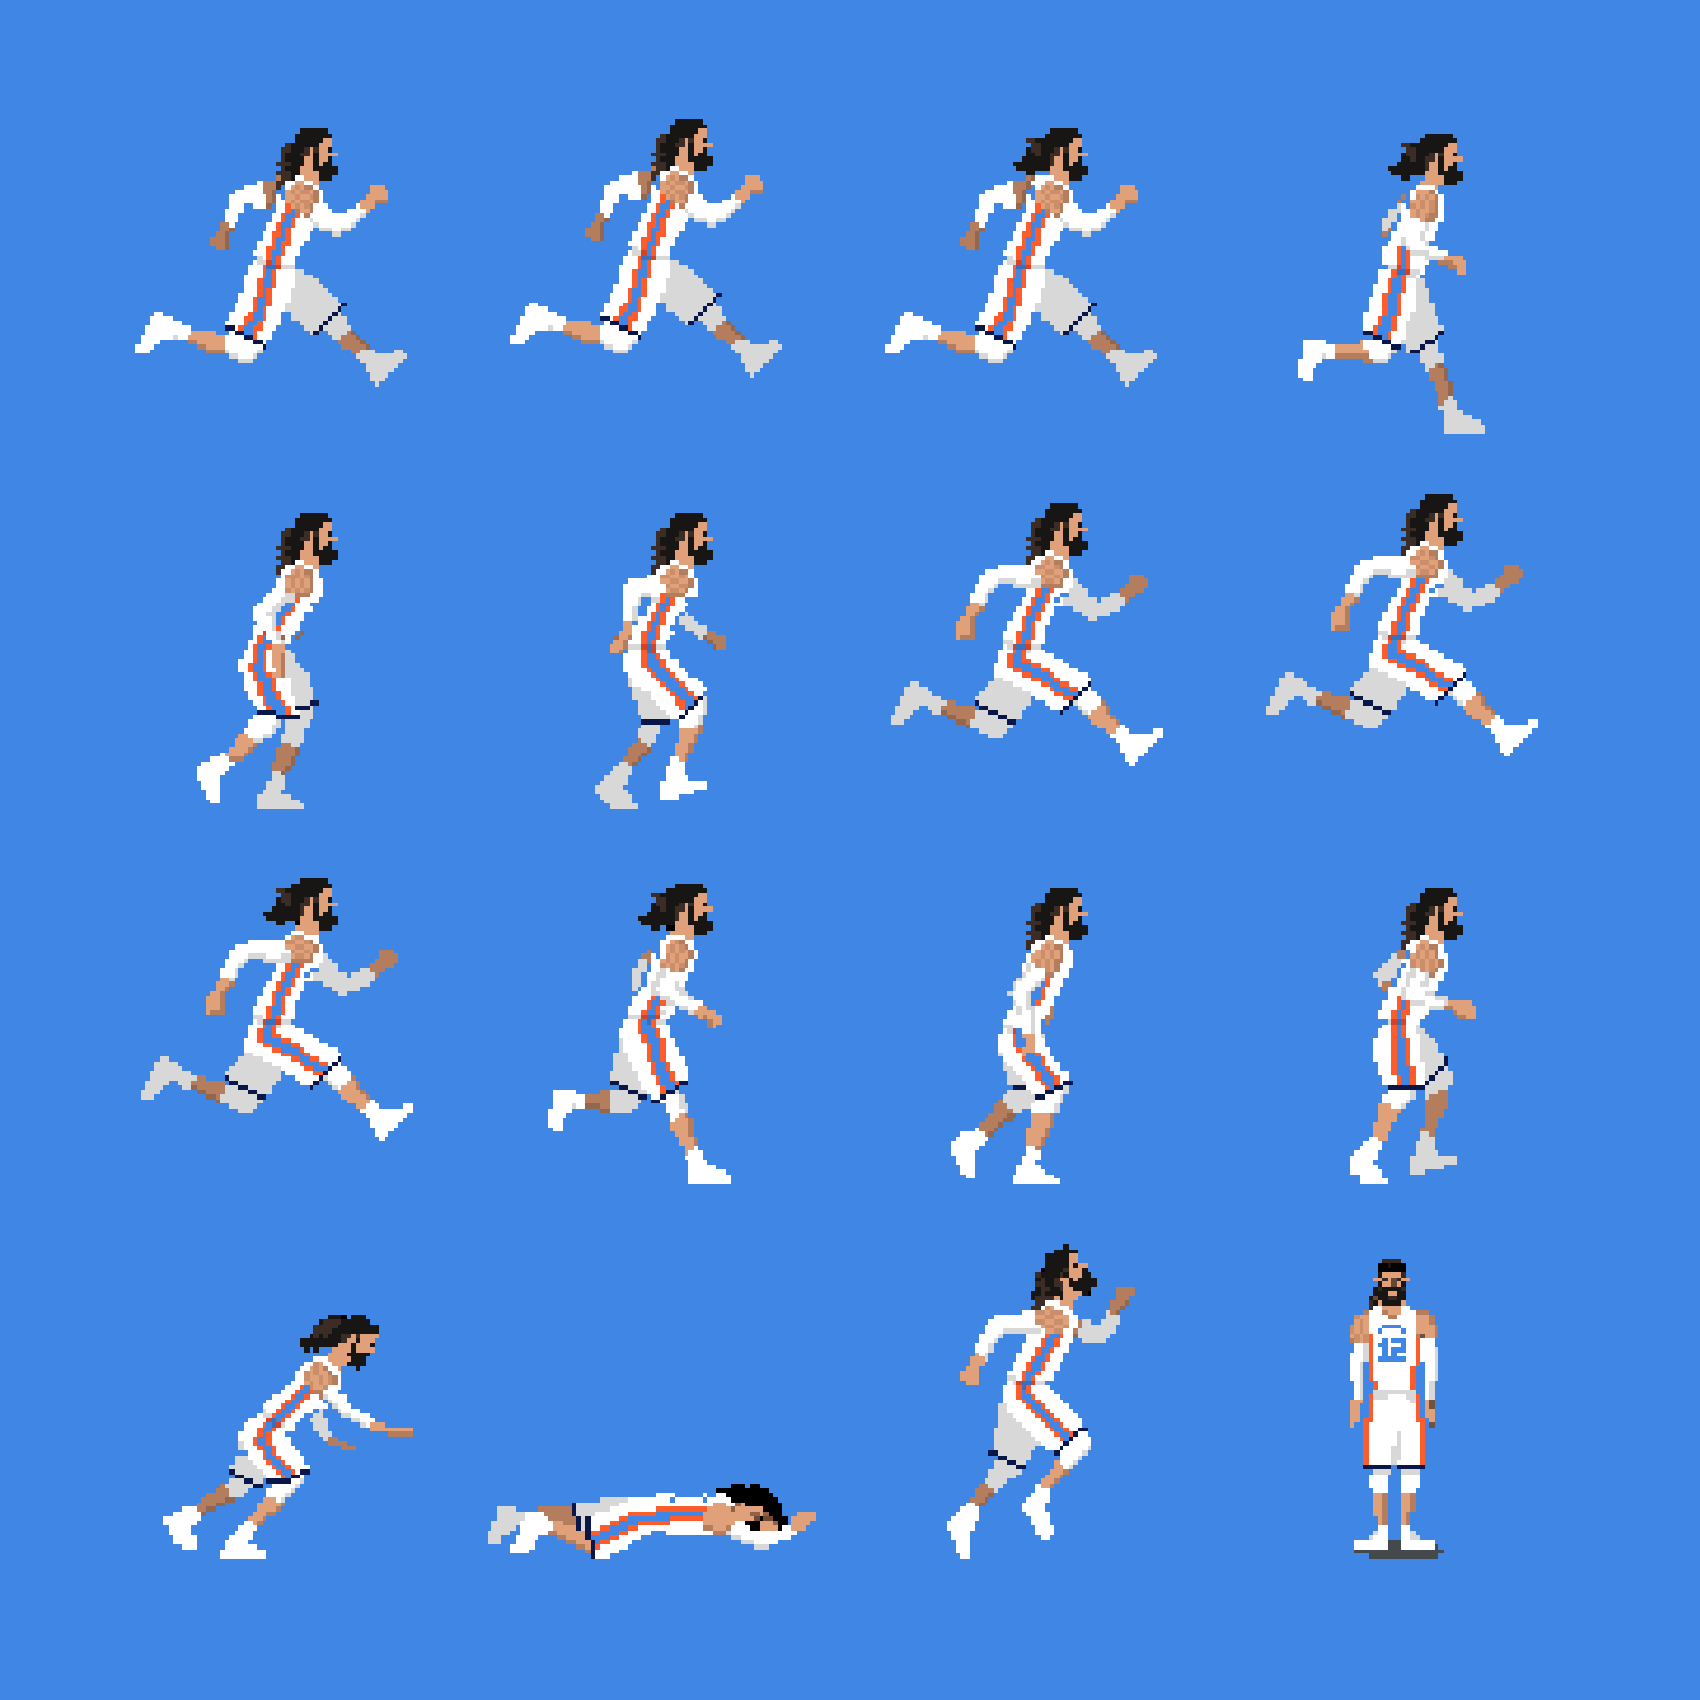
Running Animations
The running animations for each player were definitely the most time-consuming part of creating the game art. I started by researching running animation and animating pixel art. One of my biggest sources of inspiration was the art of Pedro Medieiros. He has tons of educational artwork describing tricks and tips for creating motion with pixel art. So I started out trying to create a skeleton model for the running animation. While doing this, I was also trying to figure out the level of detail we wanted for the players. Initially, I created something too detailed and too high resolution. We also played with how many frames the animation should be. We started with 6 frames but found we wanted the animation to be less choppy. We ended up creating a 12-frame running animation. After a few iterations, we arrived at something we liked.
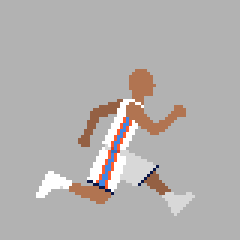
Setting up the frames in Aseprite was surprisingly intuitive and allowed a lot of copy/pasting from frame to frame. We also needed falling, jumping, and standing positions for the players. Aseprite made it really easy to create all of the needed frames for a player in a single file, then allowed us to group those together and loop them independently.

Once we had the basic movements and positions down in the file, I needed to create each character. Since our players ranged from six feet tall (Chris Paul) to seven feet tall (Steven Adams), I didn’t want each character to be the exact same height in the game. Even though you’d never see them side by side, I created 3 variations, a small, medium, and large. I picked a size for each of the players and began to add personal details, like shooting sleeves, tights, hair, etc. Stephen Adams’ flowing locks were probably the most fun to create.

After all of the players were created, I could easily export a sprite sheet for each player from the file I created. It contained all of the frames needed for that player, which we were able to play back from within the game.
Building a Retro-style Game?
All in all, I was super happy with Aseprite and would use it again. Check out Aseprite’s website for a more extensive overview of its features. And if you’re in need of a retro-style video game for your company or sports team, give us a shout!
